End to end testing using Cypress.js
Get started writing your first frontend end to end test so that you can catch bugs early and ship error-free features.
Testing has become an essential aspect of software engineering, and for good reason, too. Writing software of any complexity can often be a messy task, and this only gets worse when teams get larger and more people start to work on the same codebase.
This problem is worsened in frontend development, where there are so many moving parts that writing unit and functional tests might not be enough to verify the application’s correctness. For example, you can’t really verify that a particular user flow doesn’t cause issues through a unit test.
End-to-end testing allows you to replicate user behaviour on your application and verify that everything works as it should. If you’re writing production-grade web apps, writing e2e tests is a no-brainer.
In this article, we’ll take a look at how to write useful e2e tests on the frontend using Cypress.js.
While there are other e2e testing tools like Selenium and Nightwatch.js, we’ll focus on Cypress because of its suite of features, which include time travelling through your tests, recording your tests for later playback, etc.
Note: To follow along with this tutorial, you’ll need to have Node.js installed. If you don’t have it, you can download the latest stable version here.
Let’s create a new project and set up Cypress so we can get started.
Initialize a new project by running the following:
Install Cypress as a dev-dependency:
Update the project’s scripts by opening package.json and updating your scripts to the following:
Create a file called cypress.json in the root folder. This is how you customize Cypress’ behaviour for this specific project. Add the following in it and save.
Why we do this will be explained further down, so keep reading.
User stories (for those of us who practice Agile) usually follow a format that might look similar to this: “When a user takes a specific action, then the user should see this.”
Following this pattern, you can determine how to go about writing an e2e test for that specific story. All you need to do is simulate taking the action the user is expected to take through the test and then assert that the application state matches what you expect.
For frontend testing, those steps can usually be broken down into these:
We’re going to write three tests to assert that we can perform certain actions on Wikipedia by mimicking a user’s actions. For each test, we’ll write a user story before writing the actual test.
Before we get started with writing the tests, you will have to create a special folder to hold your Cypress tests. In the root of your project, run the following commands:
All our Cypress tests will go inside this /integration folder. Don’t worry about the name of the folder, as you can store any type of test in here.
Note: Don’t use Cypress on a website/application that you do not own. Cypress is solely meant for testing your own apps and not as a tool for automating your personal life.
Test 1: A user can perform a search from the homepage
User story When a user visits the homepage, types in the search box, and click on the search icon, then the user should see a new page populated with the results from their search term.
The user story is pretty straightforward: it is just asserting the correct behaviour for a search action on the homepage by a hypothetical user. Let’s write a test for it.
Inside the /integration folder, create a new file called homepage_search_spec.js and open it in your favourite text editor (I use Visual Studio Code).
Let’s go through the test and see how it matches the steps we defined earlier.
A majority of your e2e tests will follow the above format, and you can begin to see the benefits of testing your applications this way. You don’t need to care about how the app is handling these actions in the background; all you care about is that your app should perform a certain way for a certain action.
How about the syntax? One thing I like about Cypress is how intuitive the syntax is. It uses natural language that makes it easy for even non-programmers to read and understand your tests.
Let’s run the test. In your terminal, run npm test and Cypress will look inside the cypress/integration folder and run all the tests there.
But this is not the only way to run your tests. You can run them in a GUI, where you get a real-time view of your app as Cypress manipulates it according to your test spec.
In your terminal, run npm run cypress:open and a window should pop up that looks like this:
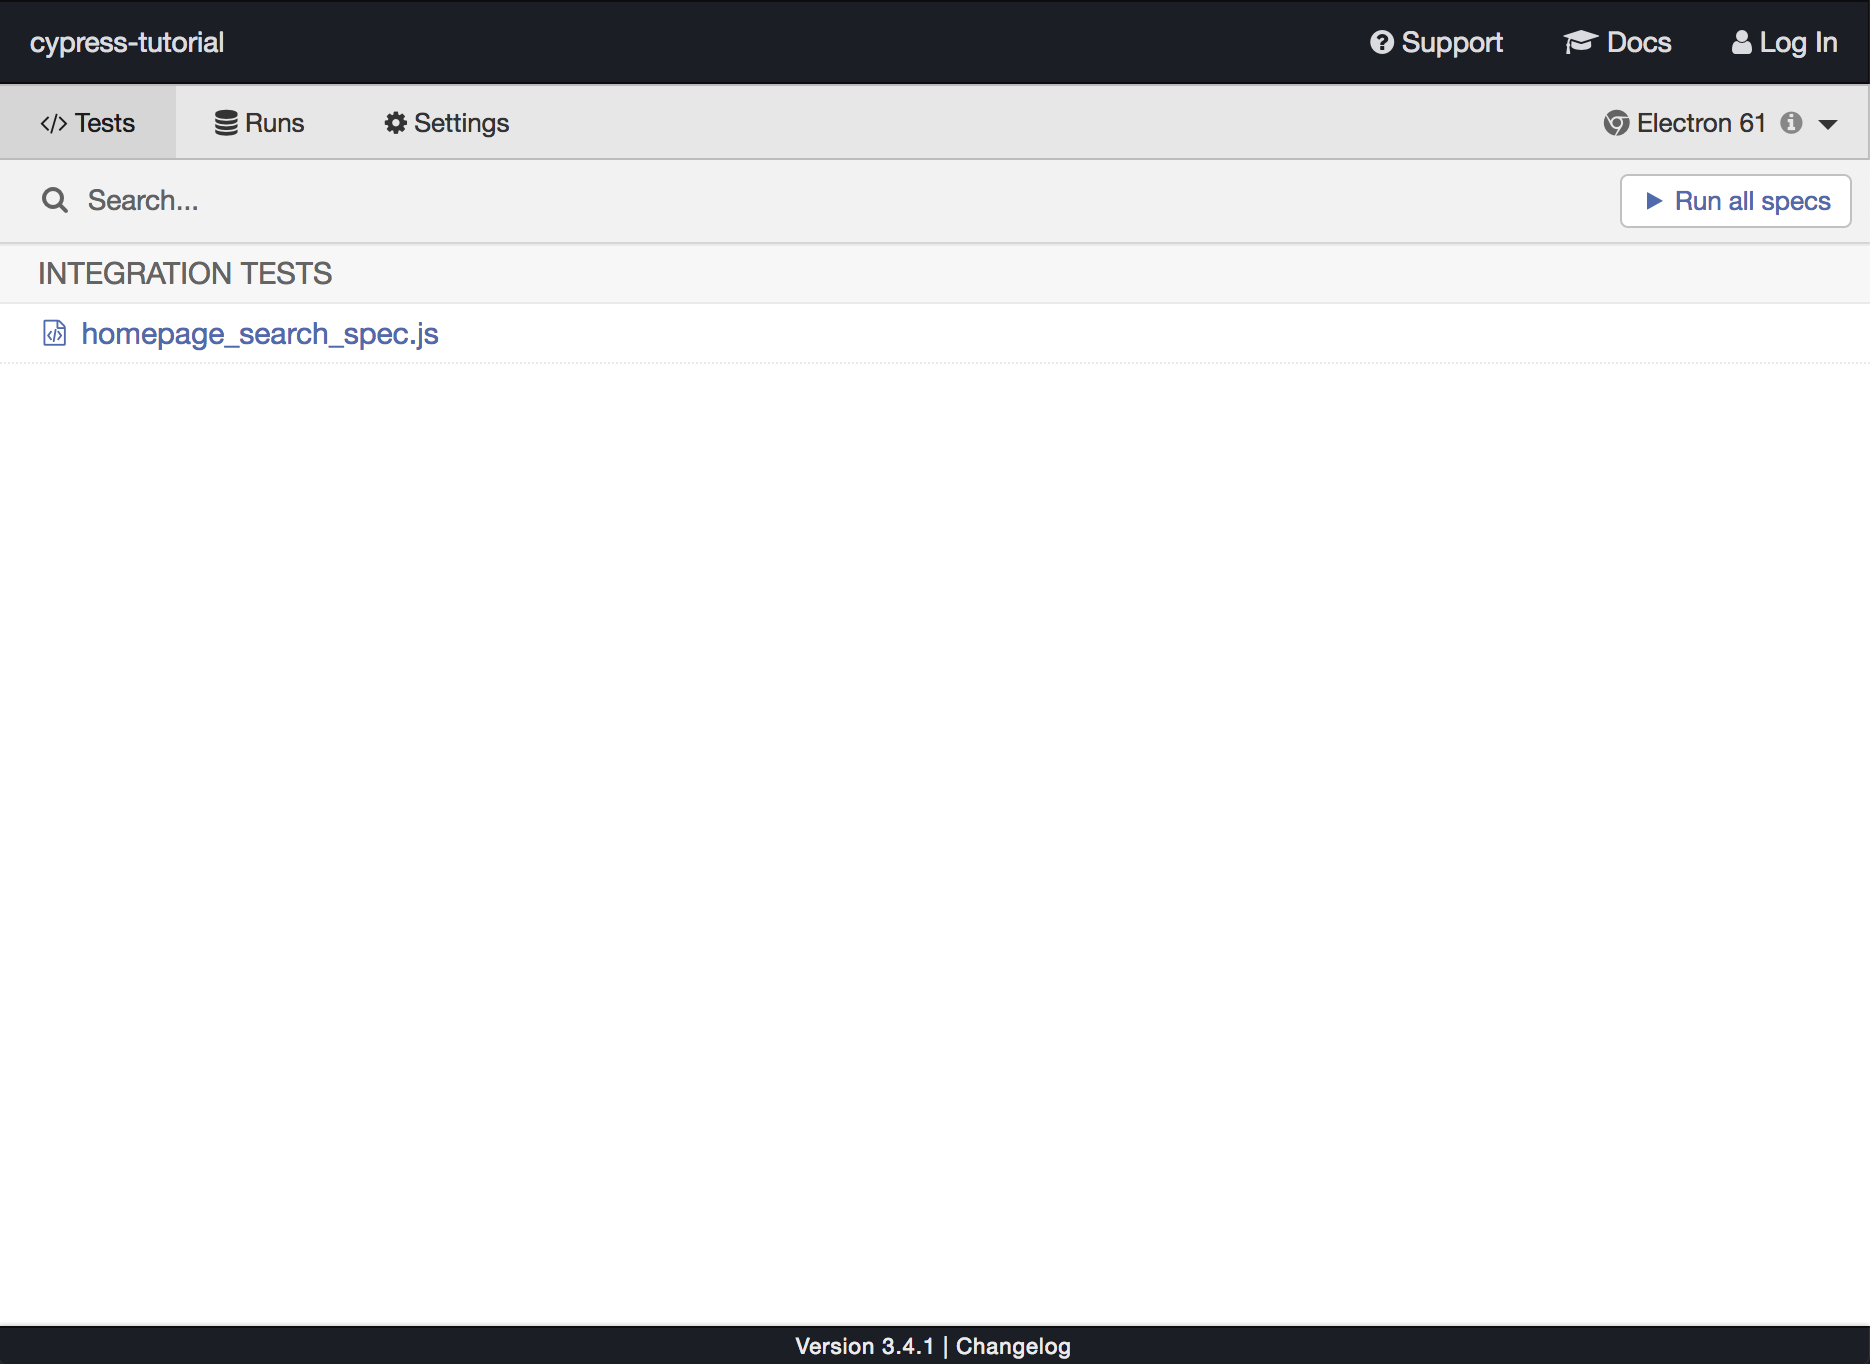
Simply click on homepage_search_spec.js to run your tests and you should see another window pop up.
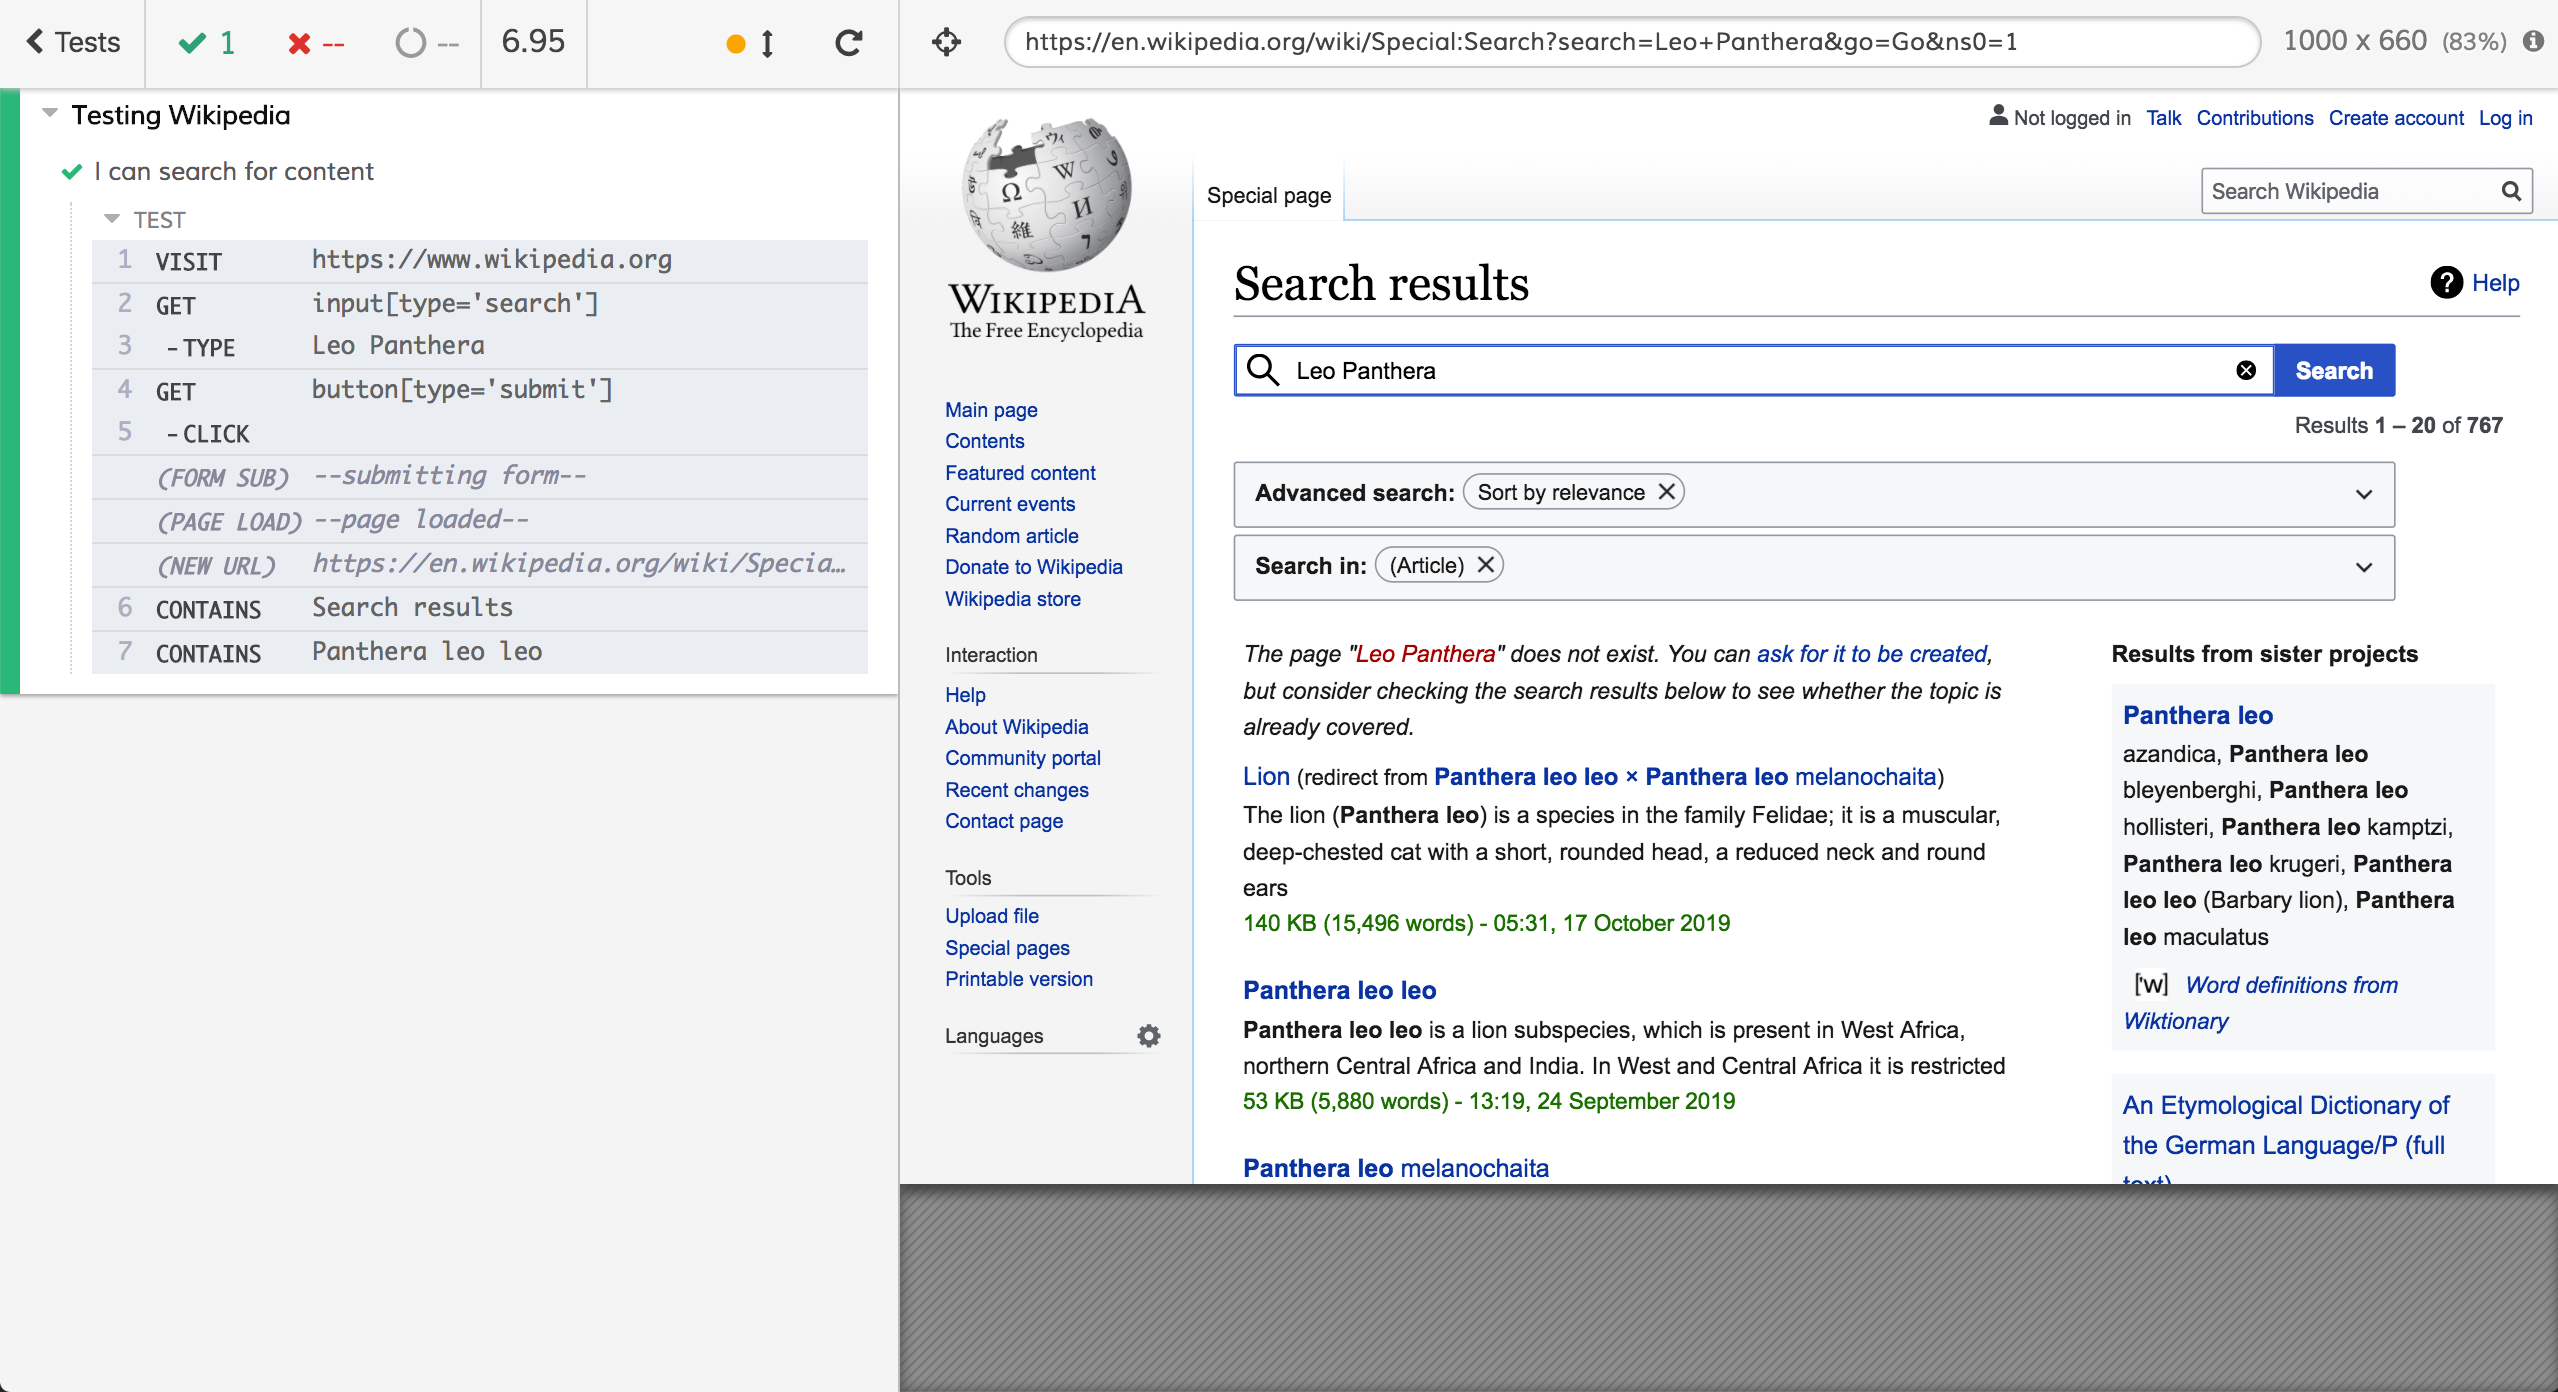
At the top left of the window, you can get a quick view of how many passing and failing tests you have in your test suite. On the right side of the window is what a user would see if they interacted with your application the way you specified in the test.
The left side is where most of the magic happens. Here you can see which test is currently running, the actions being taken, and the results of those actions.
With this simple test, we’ve been able to assert that whoever worked on the search functionality for Wikipedia has been able to satisfy the hypothetical user story requirements.
Test 2: A user can switch languages from the homepage
User story When a user visits the homepage, clicks on the language switcher, and selects a new language, then the user should be redirected to the appropriate domain for the selected language.
Inside the /integration folder, create a new file called homepage_switch_language_spec.js and open it.
Now let’s talk about some Cypress-specific syntax.
On line 3, we’re simply visiting Wikipedia’s homepage. On line 4, we assert that we’re on the page we want to be on by confirming that the page contains the text “Read Wikipedia in your language.”
On line 5, we query the language switcher button by its id and we simulate a click on it. I know the id because I inspected it in Chrome’s dev tools. This brings me to an important concept in writing Cypress tests: there are multiple ways to select a DOM element on Cypress. You can do it by targeting its id, its class, or even its tag type.
In this particular test, we’re targeting the button’s id, but in our previous test, we targeted the tag name and attribute. You can read about the different ways of selecting a DOM element here.
On line 6, we encounter another common Cypress command, which you’ll notice shows up a lot in tests. We assert that there’s an element with the text “Yorùbá” on the DOM, and then we simulate a click on it.
This action will cause Wikipedia to redirect you to the appropriate domain for the language you selected. In our case, we selected the Yorùbá language from West Africa, and we can confirm that we were redirected to the correct page by looking at the current page’s URL.
On line 7, we do exactly that. By calling cy.url() we get the URL of the current page as text and then we assert that it should equal the appropriate domain for the Yorùbá language.
On line 8, we have an extra optional check to see if there is any content on the page in the Yorùbá language.
Bonus fact: Ẹ kú àbọ̀ means “Welcome” in the Yorùbá language and is pronounced: Eh — Koo — AhBuh.
Run the test the same way we ran the previous one, and it should pass.
Test 3 — A user can check the definition of a word on Wiktionary
User story When a user visits the homepage and clicks on the link to Wiktionary, then the user should be redirected to wiktionary.org.
When a user on wiktionary.org searches for a definition by typing in the search bar and hits enter, then the user should be redirected to a page with the definition of that search term.
Another straightforward user story. We want to check for the definition of the word “Svelte” on Wiktionary, but we’ll start off on Wikipedia’s homepage and navigate to Wiktionary before searching for the word.
Inside the /integration folder, create a new file named homepage_search_definition.js and open it.
Let’s walk through this test the same way we did the previous one.
On line 3, we visit Wikipedia’s homepage as usual. On line 4, we target a class name, pick the third element with the class (don’t forget that indices start at 0), and simulate a click on the element.
Before we move further, a little caveat: if your code relies on autogenerated CSS classes, targeting elements by class names might result in inconsistent test results. In those cases, targeting by id or tag type and attribute would be the way to go.
On line 7, we assert that we’re on the correct domain by checking the URL using cy.url().
Another caveat: If you’re testing your own app, the need to navigate to another domain may be rare, and it’s for this reason this test would fail if we didn’t add "chromeWebSecurity": false in our cypress.json config.
On line 8, we target the search input by its id, and then we simulate a change event by typing in “Svelte” and hitting the enter button (hitting the enter button is handled by "{enter}"). This action takes us to a new page with the result of our query.
We then confirm on lines 9 and 10 that we’re on the correct page by asserting that the words “Etymology” and “svelte” can be found on the page.
Run the test the same way we ran the previous one and marvel at your newfound skill!
You’ve seen how easy it is to verify the correctness of your web app by writing simple e2e tests using Cypress. We’ve barely scratched the surface of what Cypress can do and some of the features it provides.
For example, you can see screenshots of your tests and even watch recorded videos by looking under cypress/videos. You can even define custom commands to avoid code repetition, mock API response data using fixtures, etc.
Having well-written end-to-end tests can save you hours of development time and can help you catch bugs and unexpected behaviours before you merge into production. Get started by going through the Cypress docs and playing around until you get comfortable enough to start writing live tests.